
31
Aug
- 1. The Chemistry of Composting: The C:N Balance Explained
- 2. Top 8 Composting Mistakes (And How to Fix Them)
- Mistake #1: Adding the Wrong Materials
- Mistake #2: Not Balancing Browns and Greens
- Mistake #3: Ignoring Moisture Levels
- Mistake #4: Forgeting to Aerate (Turn) the Pile
- Mistake #5: Leaving Scraps Exposed on Top
- Mistake #6: Making the Pile Too Small (or Too Large)
- Mistake #7: Adding Whole, Unchopped Materials
- Mistake #8: Composting Diseased Plants or Noxious Weeds
- 3. Step-by-Step Recovery Plan for a Failing Compost Pile
- 4. Troubleshooting Diagnostic Matrix
- 5. How to Know When Your Compost is Ready to Use
- Building Great Soil with Lumora Online
- 1. What You Need (The Aerated Compost Tea Setup)
- 2. Step-by-Step Brewing Guide
- 3. How to Apply Compost Tea
- 4. Key Safety Rules & Red Flags
- 1. Recipe & Food Adjustments (Bacteria vs. Fungal)
- 2. Step 1: Pre-Condition Your Compost (The Fungal Boost)
- 3. Step 2: The Fungal Tea Brew Recipe (5-Gallon Batch)
- 4. Application Methods for Woody Perennials
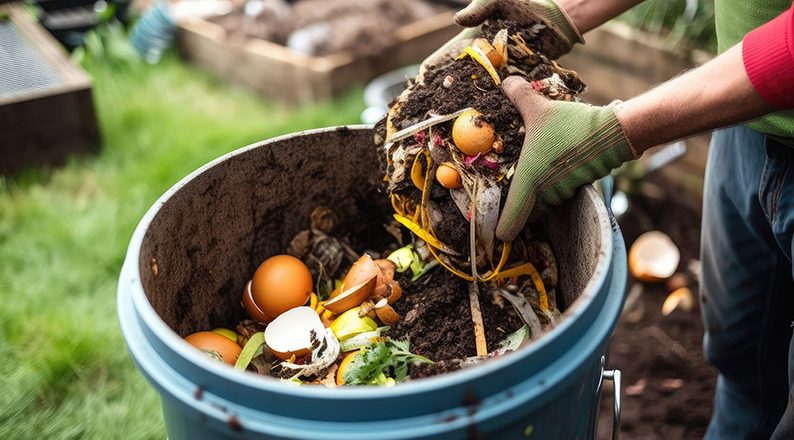
Composting for Beginners: Common Mistakes to Avoid: 10 Fixes for Odors & Slime. Mastering composting for beginners: common mistakes to avoid is the fastest way to turn everyday kitchen scraps and yard waste into nutrient-dense “black gold” for your garden. Composting seems simple in theory—toss organic matter into a pile and let nature do the rest. However, when left unmanaged, a fresh compost pile can quickly transform into a soggy, foul-smelling, pest-attracting disaster.
Understanding composting for beginners: common mistakes to avoid does not require a degree in microbiology. It comes down to providing four basic elements for beneficial micro-organisms: Carbon (browns), Nitrogen (greens), Oxygen (airflow), and Water (moisture). When these four factors fall out of balance, decomposition halts and problems arise.
In this comprehensive guide from Lumora Online, we will break down the primary mechanics of organic breakdown, diagnose pile failures, and reveal composting for beginners: common mistakes to avoid so you can produce rich, clean humus with confidence.
1. The Chemistry of Composting: The C:N Balance Explained
At its core, composting is the managed biological decomposition of organic material by bacteria, actinomycetes, and fungi. These organisms need a balanced diet:
┌─────────────────────────────────────────────────────────┐
│              THE CARBON TO NITROGEN BALANCE             │
├──────────────────────────┬──────────────────────────────┤
│ Carbon-Rich "Browns"     │ Nitrogen-Rich "Greens"       │
├──────────────────────────┼──────────────────────────────┤
│ Dry leaves, straw, wood  │ Kitchen scraps, green leaves,│
│ chips, cardboard, paper  │ coffee grounds, fresh grass  │
├──────────────────────────┼──────────────────────────────┤
│ Provides energy/structure│ Feeds microbial growth       │
│ Ideal Ratio: ~2:1 to 3:1 (by volume) of Browns to Greens │
└──────────────────────────┴──────────────────────────────┘
When you add too many greens, high moisture and excess nitrogen turn the pile into a slimy, anaerobic mess that smells like ammonia or rotting garbage. Conversely, if you add too many browns without moisture or nitrogen, your pile will sit completely inert for months without decomposing.
2. Top 8 Composting Mistakes (And How to Fix Them)
Mistake #1: Adding the Wrong Materials
- The Problem: Tossing meat, bones, dairy, greasy oils, pet waste (dog/cat manure), or chemically treated lawn clippings into your pile.
- Why It Fails: Meat, dairy, and grease attract rodents, raccoons, and flies while producing putrid odors. Dog and cat feces carry dangerous pathogens and parasites that survive in low-temperature compost piles.
- The Solution: Stick exclusively to herbivore manure, vegetable and fruit scraps, coffee grounds, eggshells, and clean yard waste.
Mistake #2: Not Balancing Browns and Greens
- The Problem: dumping endless buckets of raw fruit peels, coffee grounds, and fresh grass clippings into a bin without adding dry carbon material.
- Why It Fails: High nitrogen and high water content compact the pile, driving out oxygen.
- The Solution: For every bucket of green kitchen scraps you dump into your bin, add two to three buckets of shredded cardboard, dry leaves, or straw.
Mistake #3: Ignoring Moisture Levels
- The Problem: Letting your compost pile dry out completely, or allowing it to become waterlogged during heavy rains.
- Why It Fails: Microbes require a thin film of water around organic particles to move and feed. If the pile is bone-dry, microbes go dormant. If it is soaked, they drown, letting smelly anaerobic bacteria take over.
- The Solution: Aim for the consistency of a wrung-out sponge. Squeeze a handful of compost: if water drips out rapidly, add dry browns. If no moisture is felt and it crumbles, lightly hose down the pile while turning it.
Mistake #4: Forgeting to Aerate (Turn) the Pile
- The Problem: Building a compost heap and never disturbing it for six months.
- Why It Fails: Aerobic (oxygen-loving) bacteria break down waste quickly and without foul smells. As they work, they consume all available oxygen in the center of the pile. Without air, decomposition stalls.
- The Solution: Turn your pile using a pitchfork or garden fork every 1 to 2 weeks to introduce oxygen and move outer materials inward.
Mistake #5: Leaving Scraps Exposed on Top
- The Problem: Dumping fruit peels, melon rinds, or sweet scraps directly on top of the pile and walking away.
- Why It Fails: Exposed food scraps send open invitations to fruit flies, houseflies, rats, and raccoons.
- The Solution: Practice the “capping” method. Whenever you add kitchen waste, dig a shallow hole in the center of the pile, deposit the food, and cover it completely with at least 4 to 6 inches of dry leaves, straw, or shredded paper.
Mistake #6: Making the Pile Too Small (or Too Large)
- The Problem: Starting a tiny pile in a 1-gallon bucket, or building a giant heap 8 feet high.
- Why It Fails: A pile under 3x3x3 feet ($1\text{ cubic yard}$) lacks the critical mass needed to retain internal heat. Piles larger than 5x5x5 feet crush themselves under their own weight, cutting off airflow to the core.
- The Solution: Keep your home compost bin sized between 3x3x3 feet and 4x4x4 feet for optimal heat retention and easy management.
Mistake #7: Adding Whole, Unchopped Materials
- The Problem: Throwing intact avocado pits, whole broccoli stalks, or long woody branches directly into the bin.
- Why It Fails: Microbes decompose material from the outside in. Large chunks present tiny surface areas relative to their volume, taking years to break down completely.
- The Solution: Chop, shred, or crush bulky waste before composting. Run dry leaves through a lawnmower, chop vegetable stalks with secateurs, and shred cardboard boxes into small strips.
Mistake #8: Composting Diseased Plants or Noxious Weeds
- The Problem: Tossing tomato plants infected with late blight, or weeds loaded with mature seed heads, into a cold compost pile.
- Why It Fails: Unless your compost pile reaches and maintains high temperatures ($135^\circ\text{F}$ to $160^\circ\text{F}$ or $57^\circ\text{C}$ to $71^\circ\text{C}$) for several consecutive days, persistent fungal spores and weed seeds survive intact. Spreading finished compost back into your garden will re-infect your crop beds.
- The Solution: Bag and discard diseased plants or stubborn invasive weeds in the trash rather than taking the risk.
3. Step-by-Step Recovery Plan for a Failing Compost Pile
If your compost pile currently smells bad, is covered in flies, or has stopped decomposing entirely, follow this 5-step restoration process:
1.Perform a Moisture & Smell Audit:Identify whether the pile is anaerobic or dormant.
Check your pile. If it smells sour like rotten eggs or ammonia and feels wet, it is drowning in nitrogen and water. If it smells like nothing, feels bone-dry, and shows no decay, it lacks water and nitrogen.
2.Incorporate Coarse Carbon Material:Essential for wet, smelly compost bins.
If the pile is wet and smelly, add 2 to 3 bags of dry carbon material (straw, coarse wood shavings, or dry shredded leaves). These create air pockets and absorb excess liquid instantly.
3.Turn the Entire Pile Completely:Reintroduces oxygen to the core of the heap.
Fork the material out of your bin, mixing outer layers into the middle. Break up mats of wet grass or clumped leaves as you restack the pile.
4.Hydrate to a Wrung-Out Sponge Consistency:Adjust water content while rebuilding.
If your pile was dry, sprinkle water lightly layer-by-layer as you rebuild it. Stop immediately when the material feels damp to the touch without leaking free water.
5.Seal the Top with a 4-Inch Dry Layer:Prevents pest attraction and fly breeding.
Finish the rebuilt pile by applying a clean, 4-inch blanket of dry leaves or shredded cardboard over the top surface to trap odors and keep pests out.
4. Troubleshooting Diagnostic Matrix
Review this reference table whenever your compost bin displays unusual behavior:
| Problem / Symptom | Primary Cause | Immediate Remedy | Long-Term Prevention |
| Rotten egg / ammonia odor | Too much nitrogen, excess water, lack of air | Turn pile immediately; mix in dry carbon “browns”. | Maintain a 2:1 or 3:1 brown-to-green volume ratio. |
| Pile refuses to heat up or decompose | Pile is too dry, lacks nitrogen, or is too small | Add nitrogen greens (coffee grounds, fresh grass) and moisten. | Build piles to at least 3x3x3 feet. |
| Attracting flies, rats, or raccoons | Meat, grease, or exposed surface food scraps | Cover all food scraps under 4–6 inches of dry leaves or paper. | Never compost meat, dairy, oil, or pet waste. |
| Tough, un-decomposed woody chunks | Wood pieces added were too large | Sieve finished compost; toss large chunks back into active pile. | Shred or chop all woody garden prunings before adding. |
| Pile is infested with ants or fire ants | Soil is too dry and undisturbed | Thoroughly soak the pile with water and turn it vigorously | Maintain proper sponge-like moisture at all times. |
5. How to Know When Your Compost is Ready to Use
Using unfinished, active compost in your garden can burn plant roots because decomposing microbes temporarily strip nitrogen out of the surrounding soil.
┌─────────────────────────────────────────────────────────┐
│              FINISHED COMPOST CHECKLIST                 │
├──────────────────────────┬──────────────────────────────┤
│ Test Criteria            │ Ready State                  │
├──────────────────────────┼──────────────────────────────┤
│ Appearance               │ Dark brown/black, fine crumbly│
│                          │ texture; no original food visible│
├──────────────────────────┼──────────────────────────────┤
│ Smell                    │ Rich, pleasant, forest-earthy;│
│                          │ zero ammonia or sour odor    │
├──────────────────────────┼──────────────────────────────┤
│ Temperature              │ Cooled down to ambient air;  │
│                          │ no heat produced after turning│
└──────────────────────────┴──────────────────────────────┘
Once your pile passes all three checks, let it cure undisturbed for 3 to 4 weeks. Then, sieve it through a hardware cloth screen and spread this rich organic humus over your vegetable beds and container plants!
Building Great Soil with Lumora Online
Avoiding these typical pitfalls when composting for beginners: common mistakes to avoid guarantees success. By balancing your carbon and nitrogen materials, keeping moisture levels steady, and turning your pile periodically, you turn household waste into invaluable soil nutrients.
Inspect your compost pile today, correct any moisture or airflow imbalances, and build cleaner, richer soil naturally.
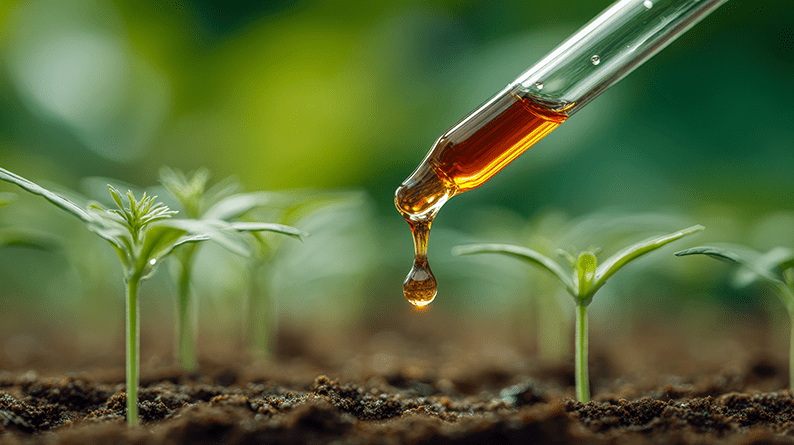
Brewing liquid compost tea is one of the single best ways to supercharge your garden. Unlike liquid fertilizers that simply add raw nutrients, aerated compost tea (ACT) brews billions of beneficial bacteria, protozoa, and mycorrhizal fungi, delivering them directly to your soil and plant leaves.
1. What You Need (The Aerated Compost Tea Setup)
To brew high-quality, beneficial compost tea, you must keep the water aerated (oxygenated). Without oxygen, the brew can quickly become anaerobic, multiplying harmfull pathogens instead of good microbes.
- 5-Gallon Bucket: Clean, food-grade plastic bucket.
- Aquarium Air Pump & Bubbler: A pump rated for 10–20 gallon tanks, paired with 2 large air stones or a bubble ring.
- Mesh Brew Bag: A 400-micron mesh bag, a paint strainer bag, or an old clean pillowcase.
- Finished Compost: 2 to 4 cups of high-quality, fully cured compost or rich worm castings.
- Microbe Food (Unsulfured Blackstrap Molasses): 1 to 2 tablespoons (feeds beneficial bacteria).
- De-chlorinated Water: Chlorine in tap water kills the microbes you are trying to grow.
Crucial Tip (De-chlorinate First): Fill your bucket with tap water and run the air bubbler in it for 12 to 24 hours before adding your compost. The aeration off-gasses chlorine and chloramines completely.
2. Step-by-Step Brewing Guide
1.Prep the Water:Off-gas chlorine before brewing.
Fill the 5-gallon bucket with tap water and turn on the air pump. Let it bubble uncovered for 12–24 hours to eliminate all chlorine.
2.Fill the Brew Bag:Use fully mature, sweet-smelling compost.
Place 2 to 4 cups of finished compost or fresh worm castings inside your mesh bag. Tie the top securely so solid particles don’t escape and clog your sprayer later.
3.Add Microbe Foods:Kelp meal or humic acid adds fungal diversity.
Stir 1 to 2 tablespoons of unsulfured blackstrap molasses into the water. If targeting fungal growth, add 1 tablespoon of liquid kelp or humic acid.
4.Submerge and Bubble:Keep continuous airflow for 24 to 36 hours.
Drop the compost bag into the bucket so it hangs near the air stones. Ensure the bubbles agitate the bag continuously. Brew for 24 to 36 hours at room temperature (65°F–75°F / 18°C–24°C).
5.Harvest and Apply Immediately:Use within 4 hours of turning off the pump.
Turn off the pump, remove the bag, and squeeze out liquid gently. Use the tea within 4 hours before microbes run out of dissolved oxygen.
3. How to Apply Compost Tea
┌──────────────────────────────────────────────────────────────────────────┐
│                      APPLICATION METHODS MATRIX                          │
├─────────────────────┬──────────────────────────┬─────────────────────────┤
│ Method              │ How to Apply             │ Main Benefit            │
├─────────────────────┼──────────────────────────┼─────────────────────────┤
│ Soil Drench         │ Pour 1–2 cups at base of │ Inoculates root zone;   │
│                     │ each plant into root zone│ unlocks bound nutrients │
├─────────────────────┼──────────────────────────┼─────────────────────────┤
│ Foliar Spray        │ Strain well; spray directly│ Outcompetes leaf fungal │
│                     │ onto leaf top & underside│ spores (mildew/blight)  │
└─────────────────────┴──────────────────────────┴─────────────────────────┘
- Timing: Apply early in the morning or near sunset. Direct mid-day UV sunlight kills delicate micro-organisms on leaves.
- Frequency: Every 2 to 3 weeks throughout the active growing season.
4. Key Safety Rules & Red Flags
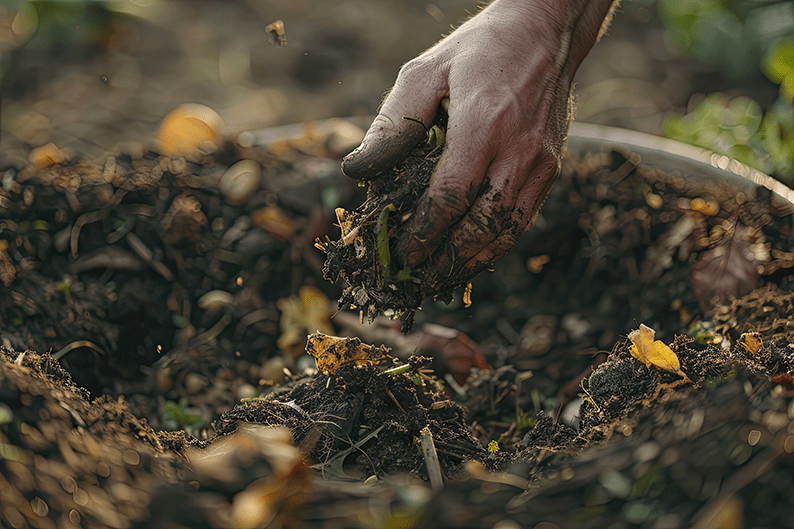
- The Smell Test: Fresh, properly aerated compost tea should smell sweet, earthy, and fresh—like a forest floor after rain.
- The Rotten Rule: If your brew smells like rotten eggs, sewage, or ammonia, do not apply it to your garden. It went anaerobic due to insufficient airflow. Dump it away from edible crops and start fresh.
Fruit trees, berry bushes, and woody perennial shrubs thrive in soil dominated by beneficial fungi rather than bacteria. While standard compost tea relies on molasses to feed bacteria, brewing a fungal-dominated tea requires shifting both the compost source and the microbe foods you feed during the steep.
Here is how to adjust your recipe, pre-treat your ingredients, and brew a fungal-rich tea tailored for woody plants.
1. Recipe & Food Adjustments (Bacteria vs. Fungal)
Bacteria love simple sugars (like molasses), which reproduce rapidly and create a bacterial-heavy tea. Fungi prefer complex carbohydrates, proteins, and humic substances.
┌─────────────────────────────────────────────────────────────────────────────┐
│                       BACTERIAL vs. FUNGAL BREW RECIPE                      │
├──────────────────────┬──────────────────────────┬───────────────────────────┤
│ Component            │ Standard (Bacterial)     │ Fungal-Dominated          │
├──────────────────────┼──────────────────────────┼───────────────────────────┤
│ Target Plants        │ Vegetables, Annuals, Lawn│ Fruit Trees, Shrubs, Perennials │
├──────────────────────┼──────────────────────────┼───────────────────────────┤
│ Base Compost         │ Standard compost/castings│ Aged fungal forest compost│
│                      │                          │ or pre-conditioned compost│
├──────────────────────┼──────────────────────────┼───────────────────────────┤
│ Primary Food         │ Blackstrap Molasses      │ Liquid Kelp & Humic Acids │
├──────────────────────┼──────────────────────────┼───────────────────────────┤
│ Secondary Foods      │ Fish Emulsion            │ Cold-Processed Fish Hydrolysate│
│                      │                          │ & Oat / Kelp Meal         │
└──────────────────────┴──────────────────────────┴───────────────────────────┘
2. Step 1: Pre-Condition Your Compost (The Fungal Boost)
Fungal hyphae are fragile and break easily in active compost. To maximize fungal populations before brewing, perform this 7-day pre-conditioning step:
- Take 4 cups of finished compost or worm castings and place them in a bucket or plastic tray.
- Mix in 2 tablespoons of finely ground oatmeal or oat flour along with 1 tablespoon of kelp meal.
- Moisten slightly until it feels like a wrung-out sponge.
- Cover loosely with a dark cloth or towel and store it in a warm, dark space for 5 to 7 days.
- Result: You will see a fine white fuzz (beneficial fungal mycelium) spreading across the compost. This pre-conditioned material is your high-fungal inoculum.
3. Step 2: The Fungal Tea Brew Recipe (5-Gallon Batch)
1.De-chlorinate 5 Gallons of Water:Eliminates chlorine that kills delicate fungal hyphae.
Fill your bucket with tap water and run your air bubbler for 12–24 hours to off-gas all chlorine and chloramines before adding any organic inputs.
2.Mix Fungal Foods into Water:Feeds complex fungal foods without over-stimulating bacteria.
Stir in 2 tablespoons of liquid humic acid, 2 tablespoons of cold-processed fish hydrolysate (not heat-treated emulsion), and 1 tablespoon of liquid kelp concentrate. Do not add molasses.
3.Bag the Pre-Conditioned Compost:Prevents mechanical damage to growing fungal strands.
Gently scoop your pre-conditioned, fuzzy compost into a 400-micron mesh brew bag. Avoid packing it tightly so air bubbles can pass through smoothly.
4.Brew for 24 to 36 Hours:Slightly longer brew time needed for fungal expansion.
Submerge the bag next to your air stones. Keep continuous aeration running for 24 to 36 hours at 65°F–72°F (18°C–22°C).
5.Apply within 4 Hours:Fungi are delicate—use immediately when aeration stops.
Turn off the pump and apply the fresh tea to the root zone and drip line of your trees and shrubs immediately.
4. Application Methods for Woody Perennials
- Drip-Line Soil Drench: Pour 1 to 2 gallons around the drip line (the ground directly beneath the outer canopy of branches) of young fruit trees or mature shrubs. This is where active feeder roots and mycorrhizal networks live.
- Trunk & Leaf Foliar Spray: Spray the tea directly onto the trunk, bark, and leaves. The beneficial fungi colonize the bark surfaces, competing against common orchard diseases like apple scab, powdery mildew, and rust.
- Mulch Application: Apply the tea over wood chips or leaf mold mulch surrounding your trees. The fungal tea accelerates the decay of woody mulch, turning it into rich soil humus.

Leave A Comment