
03
Sep
- 7 Ultimate Rules to Grow Bountiful Potatoes: The Right Time, Ideal Soil, and Best Potato Varieties
- 1. The Right Time: Understanding the Planting & Harvesting Timeline
- 2. The Right Soil: Building the Ultimate Underground Environment
- 3. Temperatures & Environmental Triggers
- 4. Types & Varieties of Potatoes Explained
- Organic Defense Strategies: Protecting Potatoes from Colorado Beetles and Late Blight
- 1. Defending Against the Colorado Potato Beetle
- 2. Preventing Late Blight (Phytophthora infestans)
- Pest & Disease Management Matrix
7 Ultimate Rules to Grow Bountiful Potatoes: The Right Time, Ideal Soil, and Best Potato Varieties
Growing your own fresh potatoes is one of the most rewarding experiences a home gardener can enjoy. There is a quiet magic in sinking a garden fork into cool earth and turning up clusters of smooth, subterranean tubers. Yet, many gardeners assume growing potatoes simply means burying an old sprouted kitchen spud in the backyard dirt and waiting for magic to happen. While spuds are notoriously resilient plants, coaxing a heavy, healthy yield of top-tier potatoes out of your garden plot requires intentional care, precise timing, ideal soil conditions, proper temperature management, and choosing the right potato varieties for your culinary goals.
Whether you are aiming for crispy homemade French fries, velvety potato soups, or buttery roasted baby potatoes, understanding the core principles of potato cultivation makes all the difference between a sparse harvest of marble-sized tubers and a bumper crop of rich, delicious potatoes.
1. The Right Time: Understanding the Planting & Harvesting Timeline
Timing is everything when learning how to grow potatoes. Because potatoes are cool-season crops, planting them too early in frozen ground leads to seed piece rot, while planting them too late in the blistering heat of mid-summer causes tuber production to stall out completely.
Spring Planting Windows
For most home gardeners, the primary window to plant seed potatoes opens roughly two to four weeks before your average last spring frost date.
- Soil Temperature Benchmark: The soil temperature at a depth of 4 inches should consistently reach 45°F to 50°F (7°C to 10°C) before planting seed pieces.
- Chitting Seed Potatoes: About 2 to 3 weeks prior to planting, place your certified disease-free seed potatoes in a cool, bright area indoors to sprout (“chitting”). Strong green sprouts roughly half an inch long give your plants a major head start once buried.
Fall and Second-Crop Planting
In warmer climates (USDA Zones 8 through 10), gardeners can enjoy two distinct growing cycles each year. A late summer planting in August allows tubers to form during the cooling autumn months, yielding fresh potatoes right around early winter.
2. The Right Soil: Building the Ultimate Underground Environment
Because potatoes expand entirely underground, the structural quality and chemical balance of your soil directly dictate their shape, skin texture, and ultimate yield. Compacted, heavy clay soils restrict tuber expansion, resulting in knobby, deformed spuds and increased risk of fungal root rot.
Ideal Soil Characteristics for Growing Potatoes
To create the perfect home for growing potatoes, aim for soil conditions that meet these key criteria:
- Soil Texture: Loose, well-draining, friable sandy loam rich in organic matter. Loose soil allows developing potatoes to push outward without physical resistance.
- Soil pH Level: Mildly acidic, with an ideal pH range of 5.0 to 6.0. Keeping soil slightly acidic is critical because higher pH levels (above 5.8 to 6.5) significantly encourage common potato scab (Streptomyces scabies), a soil-borne bacterium that creates rough, unsightly corky lesions on tuber skins.
- Organic Amendments: Work well-rotted compost or aged leaf mold into your growing beds several weeks before planting. Avoid fresh manure, as its high nitrogen content and alkaline tendencies promote foliage over tuber growth and harbor scab bacteria.
| Soil Parameter | Target Range | Purpose for Potatoes |
| pH Level | 5.0 – 6.0 | Suppresses potato scab disease and optimizes nutrient uptake |
| Texture | Loose Sandy Loam | Allows uninhibited tuber expansion and free root movement |
| Drainage Rate | Rapid to Moderate | Prevents waterlogging, oxygen starvation, and seed rot |
| Compost Ratio | 20–30% Organic Matter | Retains moisture while providing slow-release nutrients |
3. Temperatures & Environmental Triggers
Temperature governs every physiological stage of growing potatoes, from sprout emergence to foliage growth and tuberization. Understanding how ambient and soil temperatures affect your crop prevents common summer failures.
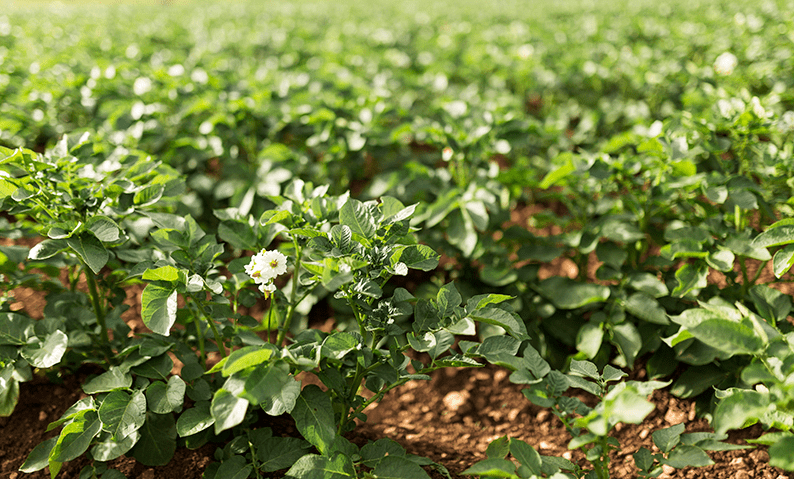
The Thermal Phases of Growing Potatoes
- Sprouting Phase (45°F – 55°F / 7°C – 13°C): Cool soil prompts seed potatoes to wake up from dormancy, establishing root systems before sending green leafy shoots above the surface.
- Foliage & Vegetative Phase (60°F – 70°F / 15°C – 21°C): Mild air temperatures foster lush green canopy expansion. Healthy leaves act as solar panels, converting sunlight into starches that will eventually feed developing potatoes.
- Tuberization Phase (60°F – 70°F Soil Temp): This is the sweet spot for tuber initiation. When soil temperatures remain in this range, the plant actively transfers starches underground.
- Heat Stress & Stagnation (Above 80°F / 27°C Soil Temp): When soil temperatures exceed 80°F, potatoes completely stop setting new tubers, and existing tubers cease growing. High heat causes the plant to expend energy on respiration rather than starch storage.
                  [ TEMPERATURE RANGES FOR POTATOES ]
                                    │
   ┌────────────────────────────────┼────────────────────────────────┐
   ▼                                ▼                                ▼
[ 45°F - 55°F ]                  [ 60°F - 70°F ]                  [ ABOVE 80°F ]
Sprouting & Rooting              Optimal Tuber Growth             Heat Stagnation
Seed wakes from dormancy;        Starches transfer underground    Tuber growth halts;
cool soil protects sprouts.      for maximum yield development.   plants suffer heat stress.
Protection Against Temperature Extremes
To keep soil cool during fierce mid-summer heatwaves, apply a generous 4- to 6-inch layer of clean straw, pine needles, or shredded leaves around your plants once they reach 8 to 10 inches in height. Heavy mulching lowers soil temperatures by as much as 10°F, preserving the ideal environment for continuous potatoes growth.
4. Types & Varieties of Potatoes Explained
Not all potatoes are created equal. Choosing the right potato variety depends on your local growing season length, space constraints, and how you plan to cook your harvest.
Categorized by Culinary Characteristics
1. Starchy Varieties (High Starch, Low Moisture)
- Examples: Russet Burbank, Idaho Russet, Yukon Gold (medium-starchy).
- Characteristics: Starchy potatoes feature dense, flaky flesh that absorbs butter and milk easily.
- Best Cooking Uses: Ideal for light, fluffy mashed potatoes, baked spuds, and crispy homemade French fries.
2. Waxy Varieties (Low Starch, High Moisture)
- Examples: Red Norland, French Fingerling, Red Pontiac.
- Characteristics: Waxy skin with firm, moist flesh that holds its structural shape even after prolonged cooking.
- Best Cooking Uses: Excellent for potato salads, hearty soups, stews, and boiling whole.
3. All-Purpose Varieties (Medium Starch & Moisture)
- Examples: Yukon Gold, Kennebec, Yellow Finn.
- Characteristics: A versatile balance between firm texture and creamy mouthfeel.
- Best Cooking Uses: Roasting, grilling, pan-frying, and mashing.
Categorized by Maturity Timelines
                                [ MATURITY CLASSIFICATIONS ]

   Early-Season Varieties          Mid-Season Varieties           Late-Season Varieties
   (70 – 90 Days)                  (90 – 110 Days)                (110 – 135+ Days)
┌──────────────────────────┐    ┌──────────────────────────┐   ┌──────────────────────────┐
│ • Red Norland            │    │ • Yukon Gold             │   │ • Russet Burbank         │
│ • Yukon Gem              │    │ • Kennebec               │   │ • German Butterball      │
│ • Dark Red Norland       │    │ • Red LaSoda             │   │ • Purple Peruvian        │
└──────────────────────────┘    └──────────────────────────┘   └──────────────────────────┘
1.Step 1: Chit and Cut Seed Potatoes:Prepare certified disease-free seed pieces.
Two weeks before planting, place certified seed potatoes in a warm, well-lit space to stimulate sturdy sprouts. Slice larger tubers into 2-ounce chunks, ensuring each piece contains at least 1 to 2 prominent “eyes.” Let cut surfaces dry for 48 hours to form a protective callous.
2.Step 2: Set Seed Pieces in Loose Soil:Plant in trenches or containers.
Dig trenches 6 inches deep spaced 2 to 3 feet apart. Place seed pieces cut-side down, eyes facing upward, spaced 12 inches apart. Cover with 3 inches of prepared loose soil mixture.
3.Step 3: Hill Plants as Foliage Grows:Block light to encourage tubers.
When stems reach 6 to 8 inches in height, mound loose soil or compost around the bases, leaving only the top leaves exposed. Repeat this hilling process 2 to 3 times as plants grow to keep developing potatoes fully buried away from sunlight.
4.Step 4: Harvest and Cure Your Crop:Proper cure time for long storage.
Harvest tender “new” potatoes 2 to 3 weeks after flowering finishes. For long-term storage potatoes, wait until top foliage dies back completely in autumn. Gently dig up tubers, brushed off excess dirt, and let them cure in a dark, humid room at 50°F – 55°F for 10 to 14 days to toughen their skins.
Organic Defense Strategies: Protecting Potatoes from Colorado Beetles and Late Blight
Protecting your potato crop organically requires a proactive, integrated approach rather than relying on reactive chemical sprays. Both the Colorado Potato Beetle (Leptinotarsa decemlineata) and Late Blight (Phytophthora infestans)—the water mold responsible for the Irish Potato Famine—can decimate a patch in days if left unchecked.
By combining cultural controls, physical barriers, biological deterrents, and organic-approved treatments, you can keep your potato crop healthy and yield-rich.
1. Defending Against the Colorado Potato Beetle
Colorado Potato Beetles (CPBs) are persistent pests. Adult beetles overwinter in the soil, emerge in spring, and lay yellow-orange egg clusters on the undersides of potato leaves. Both the soft-bodied red larvae and hard-shelled adults feed voraciously on foliage.
Organic Control Plan for Beetles
- Floating Row Covers: Cover your potato rows with lightweight spun-bond fabric immediately after planting. Anchor the edges with soil or rocks to physically prevent overwintered adult beetles from landing on emerging foliage. Remove covers once plants begin to flower to allow airflow and maintenance.
- Handpicking & Egg Crushing: Inspect leaf undersides twice weekly during spring. Handpick adult beetles and reddish larvae, dropping them into a bucket of soapy water. Squeeze yellow-orange egg masses attached to leaf undersides to destroy entire generations before they hatch.
- Bacillus thuringiensis var. tenebrionis (Bt): Apply Bt tenebrionis or Bt san diego—a naturally occurring soil bacterium—when young larvae first hatch. It acts as a stomach poison specific to leaf beetle larvae without harming bees, ladybugs, or earthworms. Note: Bt is effective on small red larvae, not adult beetles.
- Spinosad Sprays: For severe infestations, use an OMRI-listed Spinosad spray. Derived from a naturally occurring soil bacterium, it controls both larvae and adult beetles. Apply in the late evening to avoid direct contact with foraging bees while liquid is wet.
- Beneficial Insect Habitat: Plant alyssum, dill, and fennel nearby to attract predatory stink bugs, ladybugs, and lacewings, which feed on CPB eggs and young larvae.
2. Preventing Late Blight (Phytophthora infestans)
Late blight is a fast-moving, wind- and water-borne pathogen that thrives in cool, humid, wet conditions (60°F to 75°F / 15°C to 24°C). It produces dark, water-soaked spots on leaves with white, downy fungal growth on undersides, quickly turning vines into black, rotting foliage and infecting underground tubers.
                      [ LATE BLIGHT PREVENTATIVE SHIELD ]
                                       │
     ┌─────────────────────────────────┼─────────────────────────────────┐
     ▼                                 ▼                                 ▼
[ CULTURAL DIVERSITY ]         [ CANOPY AIRFLOW ]             [ ORGANIC PROTECTANTS ]
• Certified seed only          • Wide 36" row spacing         • Fixed copper sprays
• 3–4 year crop rotation       • Morning drip irrigation      • Liquid kelp root boost
Organic Prevention Plan for Late Blight
- Use Certified Disease-Free Seed Potatoes: Never plant grocery store potatoes or tubers saved from a previously infected crop, as blight overwinters inside infected potato tissue.
- Strict Crop Rotation: Rotate solanaceous crops (potatoes, tomatoes, eggplants, peppers) on a 3- to 4-year cycle. Avoid planting downwind or adjacent to tomatoes, which share susceptibility to late blight.
- Maximize Air Circulation: Space rows 30 to 36 inches apart and plants 12 inches apart. Prune low-hanging leaves in dense canopies to promote quick foliage drying after rain or dew.
- Water at the Soil Level: Avoid overhead sprinklers. Use drip irrigation or soaker hoses beneath mulch to keep foliage dry. Water early in the morning so ambient sunlight evaporates surface moisture quickly.
- Copper Octanoate / Fixed Copper: Apply OMRI-listed liquid copper sprays preventatively before high-humidity weather spells or at the first regional report of late blight. Copper creates a protective chemical layer that inhibits spore germination on leaf surfaces. Reapply every 7 to 10 days during rainy conditions.
Pest & Disease Management Matrix
| Threat | Target Stage | Best Organic Intervention | Timing & Frequency |
| Colorado Beetle | Overwintered Adults | Row covers, handpicking | Early spring as shoots emerge |
| Colorado Beetle | Young Larvae | Bt tenebrionis or Spinosad | At first hatch, every 5–7 days |
| Colorado Beetle | Eggs | Hand crushing undersides | Twice weekly during spring |
| Late Blight | Spore Prevention | Copper Octanoate spray | Preventative before wet weather |
| Late Blight | Soil / Tubers | High hilling + vine cutting | Cut infected vines 2 weeks prior to harvest |
1.Step 1: Inspect Seed and Rotate Beds:Break pest and pathogen cycles.
Verify seed potatoes are certified disease-free. Select a planting plot that has not grown potatoes, tomatoes, or peppers for at least 3 consecutive years.
2.Step 2: Install Row Covers at Emergence:Block early adult beetle arrival.
Drape floating row covers over potato stems as soon as they break through the soil surface. Secure edges tightly to prevent soil-emerging beetles from feeding and laying eggs.
3.Step 3: Conduct Weekly Scouting and Apply Bt/Copper:Monitor moisture and leaf undersides.
Scout foliage twice weekly. Crush orange egg clusters manually and spray Bt at the first sign of hatching larvae. Apply preventative copper sprays before sustained humid or rainy periods.
4.Step 4: Execute Harvest Safeguards:Protect tubers from falling spores.
If late blight strikes late in the season, cut vines off at ground level immediately and dispose of them (do not compost). Wait 14 days before digging tubers so spores on the soil surface die before coming into contact with harvested potatoes.

Leave A Comment