
31
Aug
- 10 Reasons Plant Leaves Turn Yellow and How to Fix Them
- 1. Overwatering and Root Suffocation
- 2. Underwatering and Severe Dehydration
- 3. Macronutrient Deficiencies (Nitrogen, Potassium, Magnesium)
- 4. Micronutrient Deficiencies (Iron and Zinc)
- 5. Insufficient Sunlight (Light Starvation)
- 6. Excessive Sunlight (Sun Scorch and Bleaching)
- 7. Sap-Sucking Pest Infestations
- 8. Fungal, Bacterial, or Viral Diseases
- 9. Temperature Shock and Environmental Drafts
- 10. Natural Aging and Foliage Shedding
10 Reasons Plant Leaves Turn Yellow and How to Fix Them
There is nothing quite like the panic of walking over to your favorite monstera, pothos, or backyard tomato plant only to spot a bright yellow leaf staring back at you. If you are a plant parent, it feels like an immediate accusation that you’ve done something wrong.
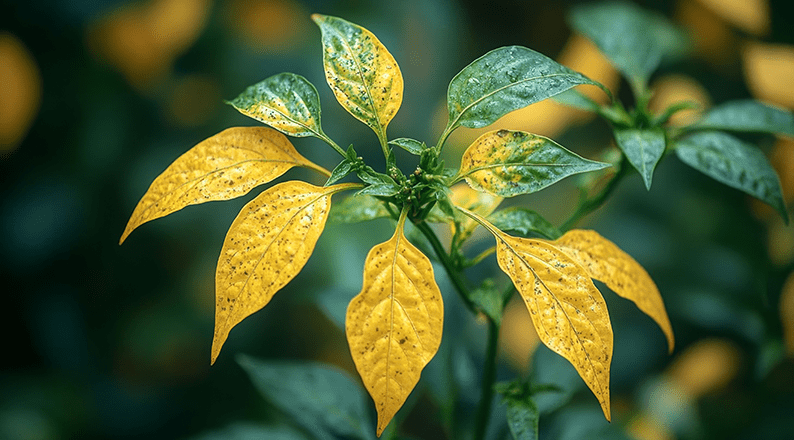
In the botanical world, leaf yellowing is known as chlorosis. This happens when a plant loses its chlorophyll—the vital green pigment responsible for absorbing sunlight and converting it into energy through photosynthesis.
Think of a yellowing leaf as your plant’s “check engine light.” It is a visual distress signal indicating that something in its environment is out of balance. However, because many different issues trigger the exact same symptom, diagnosing the root cause requires a bit of detective work.
This comprehensive, step-by-step diagnostic guide covers the top 10 reasons your plant leaves are turning yellow, how to accurately identify the specific problem, and actionable solutions to nurse your greenery back to health.
1. Overwatering and Root Suffocation
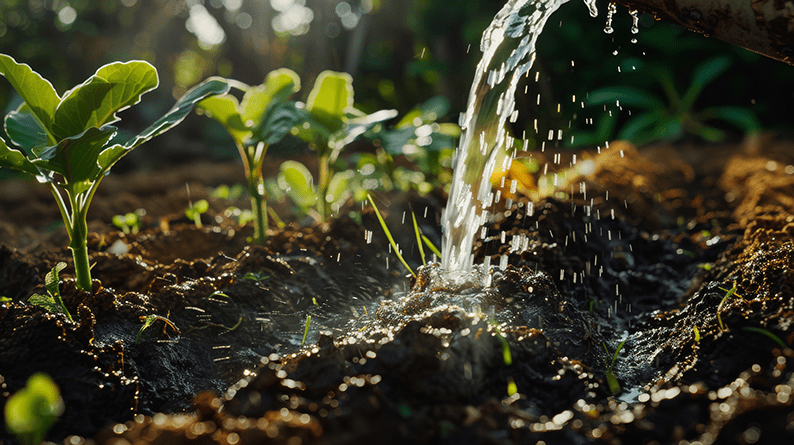
Overwatering is arguably the number one reason indoor and outdoor plants develop yellow leaves. When you water too frequently or use a pot without adequate drainage holes, the soil becomes waterlogged.
The Problem
Plants need oxygen just as much as they need water. Air pockets in healthy, loose soil allow the root system to breathe. When water fills those air pockets permanently, the roots literally suffocate under the surface. Unable to breathe, the roots begin to rot, turn black or mushy, and completely lose their ability to transport water and essential nutrients up into the rest of the plant. Because the leaves are starved of nutrients and hydration, they turn a limp, pale yellow and eventually drop off.
How to Diagnose It
- Visual Clues: The yellowing usually starts on the lower, older leaves first.
- Texture: The yellow leaves feel soft, limp, and slightly mushy rather than dry.
- Soil Check: If you stick your finger two inches deep into the soil and it feels like wet mud days after your last watering, overwatering is the culprit. You might also notice a sour, swampy smell or tiny fungus gnats flying around the topsoil.
The Solution
- Stop Watering Immediately: Let the soil dry out completely before you even think about picking up your watering can again.
- Improve Airflow and Drainage: Ensure your pot has functional drainage holes. If it sits inside a decorative outer pot (a cachepot) that traps drainage water, always empty the excess water out 15 minutes after watering.
- Assess the Roots (Emergency Repotting): If the plant continues to decline, gently pull it out of its pot. Inspect the roots. If they are brown, black, and slimy, trim away the decayed parts using sterilized pruning shears. Repot the plant into fresh, well-aerated potting mix containing perlite or coarse sand to maximize drainage.
2. Underwatering and Severe Dehydration
On the opposite end of the spectrum is underwatering. While plants are resilient, prolonged periods of drought force them into survival mode.
The Problem
When soil is bone-dry for too long, the root system cannot pull up the moisture necessary to sustain the foliage. To protect itself from total collapse, the plant prioritizes its youngest growth and newest leaves. It intentionally cuts off the water supply to its older, lower, or inner leaves, causing them to turn yellow, wither, and drop.
How to Diagnose It
- Visual Clues: The outer margins or tips of the yellowing leaves will look brown, dry, and crispy.
- Texture: The leaves feel paper-thin, brittle, and crunch when touched.
- Soil Check: The soil will look pale gray, feel completely dry down to the bottom of the pot, and may even pull away from the inner edges of the container, leaving a noticeable gap.
The Solution
- Administer a Deep Soak: A light sprinkle of water won’t fix severely dry soil because it will simply run down the gaps on the side of the pot without soaking the root ball. Instead, practice “bottom watering” or deep soaking. Submerge the base of the pot in a sink or basin filled with a few inches of lukewarm water and let it sit for 30 to 45 minutes until the topsoil feels damp.
- Aerate the Soil: If the soil has become hydrophobic (meaning it repels water because it is too dry), take a chopstick or thin stick and gently poke several holes into the soil before watering. This allows the water to actually penetrate the center of the root ball.
- Establish a Routine: Moving forward, test the moisture levels weekly using your finger rather than relying on a strict, arbitrary calendar schedule.
3. Macronutrient Deficiencies (Nitrogen, Potassium, Magnesium)
Plants require a steady balance of nutrients to synthesize chlorophyll and fuel new cell growth. Over time, potting soil becomes depleted of these nutrients as the plant absorbs them.
The Problem
When key macronutrients are missing, the plant cannot complete its basic biological processes. It begins “mobilizing” nutrients—stealing them from the old leaves at the bottom of the plant and sending them up to support the emerging new growth at the top. This results in targeted patterns of chlorosis.
How to Diagnose It
The specific pattern of yellowing tells you exactly which macronutrient is missing:
- Nitrogen Deficiency: The oldest, lowest leaves turn a uniform, solid pale yellow, while the veins of the leaf also lose their color completely. The overall plant growth stalls.
- Potassium Deficiency: The center of the leaf stays relatively green, but the absolute outer edges and tips turn bright yellow, which eventually burns to a crisp brown.
- Magnesium Deficiency: This presents as interveinal chlorosis on older leaves. The tissue between the main veins turns yellow or develops a mottled look, but the structural veins themselves remain a deep, dark green.
| Missing Nutrient | Visual Diagnostic Symptom |
|---|---|
| Nitrogen | Entire old leaf turns uniform pale yellow |
| Potassium | Outer edges and tips yellow and crisp |
| Magnesium | Interveinal yellowing on OLDER leaves |
The Solution
- Apply a Balanced Liquid Fertilizer: Flush the soil with a high-quality, water-soluble fertilizer containing an equal balance of Nitrogen, Phosphorus, and Potassium (look for an N-P-K ratio like 10-10-10 or 20-20-20 on the label).
- Targeted Amendments: For a confirmed magnesium deficiency, dissolve one tablespoon of pure Epsom salt (magnesium sulfate) into four litres of water and use it to water the plant.
- Top-Dress with Organic Compost: For outdoor garden beds or large containers, gently scratch a 5 cm layer of organic compost or worm castings into the top layer of soil. This naturally replenishes the nutrient profile over time without burning the delicate roots.
4. Micronutrient Deficiencies (Iron and Zinc)
Micronutrients are minerals that plants need in tiny doses, but their absence causes massive visual disruptions, most notably on the newest parts of the plant.
The Problem
Unlike macronutrients, minerals like iron are completely “immobile” within the plant’s vascular network. The plant cannot steal iron from its old leaves to feed the new ones. Therefore, if the soil lacks available iron, the freshly unfurling leaves at the very tips of the branches are born completely starved of chlorophyll.
How to Diagnose It
- Iron Deficiency: This causes a stark, high-contrast interveinal chlorosis exclusively on new growth. The newest baby leaves emerge looking bleached white or bright neon yellow, while the intricate map of veins remains dark green.
- Zinc Deficiency: New leaves remain tiny, look bunched up or distorted, and develop yellow, bleached spots between the veins.
The Solution
- Use Chelated Iron: Standard iron powders take too long to break down in the soil. Instead, purchase a liquid chelated iron supplement from your local garden center. Apply it directly to the soil or spray it onto the foliage as a liquid foliar spray for rapid absorption.
- Check the Soil pH: Often, iron is present in the soil, but the plant cannot absorb it because the soil is too alkaline (high pH). Test your soil’s pH; if it is above 7.0, add elemental sulfur or peat moss to lower the pH into the ideal 6.0–6.5 range, which unlocks the iron for the roots.
5. Insufficient Sunlight (Light Starvation)
Plants require adequate sunlight to power photosynthesis and maintain their vibrant green color.
The Problem
When a plant is placed in a dark corner, a dim hallway, or under the shadow of a larger structure, it cannot produce enough energy to support all its foliage. To conserve resources, the plant goes through a process of self-pruning. It systematically drops its lowest or innermost leaves—the ones receiving the least amount of ambient light anyway—after draining them of their remaining chlorophyll.
How to Diagnose It
- Visual Clues: The side of the plant facing away from the room or window turns pale yellow and drops its leaves first.
- Growth Pattern: The plant will look “leggy” or stretched out, with long, thin, spindly stems reaching desperately toward the nearest light source. New leaves that manage to grow emerge much smaller than the older ones.
The Solution
- Relocate Slowly: Move your light-starved plant closer to a window that receives bright, indirect sunlight. Do not move it directly from a dark cave into harsh, scorching, direct sunlight, or you will shock and sunburn the remaining green leaves.
- Clean the Foliage: Dust acts as a literal barrier to sunlight. Wipe down large leaves with a damp cloth every few weeks to clear away dust buildup and maximize their light-absorption capability.
- Supplement with Grow Lights: If your home lacks natural window light, install an inexpensive LED grow light set on a timer for 12 to 14 hours a day to simulate natural daylight conditions.
6. Excessive Sunlight (Sun Scorch and Bleaching)
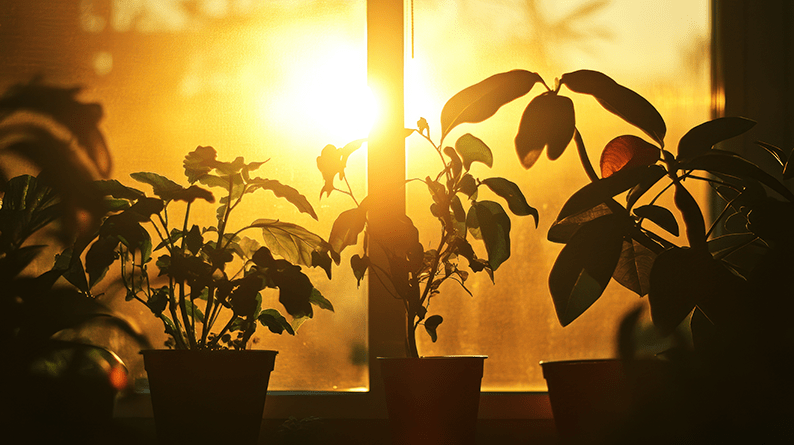
While too little light causes issues, too much direct, intense sunlight can actively damage plant tissue.
The Problem
Just like human skin, plant leaves can get sunburnt. When a shade-loving plant or an indoor tropical species is suddenly exposed to intense, direct afternoon sun rays, the ultraviolet radiation solar-bleaches the delicate chlorophyll molecules, turning the leaf tissue a sickly pale yellow or white.
How to Diagnose It
- Visual Clues: The yellowing does not start from the bottom up. Instead, it appears as bleach-white, light yellow, or tan splotches strictly on the upper leaves that face the sun directly.
- Texture: The burnt spots look dry, thin, crispy, and may eventually turn translucent or paper-brown.
The Solution
- Move out of Direct Rays: Shift the plant back a few feet away from the glass pane or place a sheer curtain over the window to diffuse the harsh rays into bright, indirect light.
- Provide Outdoor Shade: For outdoor garden beds, install a 30% shade cloth over vulnerable plants during the peak heat of midsummer afternoon hours.
- Leave Safe Foliage Intact: Do not cut off leaves that are only partially yellowed. As long as a portion of the leaf remains green, it is still actively producing energy to help the plant recover. Only prune away leaves that are 100% dead and dried out.
7. Sap-Sucking Pest Infestations
Insects can quickly drain a plant’s vitality, leaving behind telltale signs of structural and cosmetic damage.
The Problem
Common garden and indoor pests like spider mites, aphids, thrips, mealybugs, and scale insects are tiny parasites. They pierce the outer walls of the leaf tissue and stems to feed directly on the sugary sap flowing through the plant’s vascular network. As they drain the sap, they rob the local leaf cells of vital hydration and nutrients, resulting in localized yellow spot patterns.
How to Diagnose It
- Visual Clues: Look for tiny, irregular yellow dots or speckles scattered across the surface of the leaf (known as stippling).
- Physical Evidence: Flip the yellowing leaves over and inspect the undersides closely. You might see fine, silky webbing (spider mites), clusters of tiny green or black teardrop bugs (aphids), white cotton-like clusters (mealybugs), or hard, brown bumps stuck to the stems (scale). Leaves may also feel sticky due to “honeydew”—a sugary waste substance excreted by pests.
- Fine, silky webbing on leaf joints: Spider Mites
- Cotton-like, sticky white clusters: Mealybugs
- Tiny green/black clusters on new stems: Aphids
- Hard, immovable brown armor bumps: Scale Insects
The Solution
- Isolate the Plant: Move the infected plant to an isolated room immediately to prevent the bugs from spreading across your entire collection.
- Blast Them Off: Take the plant to the shower or outdoor garden hose and thoroughly blast the foliage with lukewarm water to physically dislodge the majority of the insects.
- Apply Neem Oil or Insecticidal Soap: Spray the entire plant thoroughly with organic neem oil or an insecticidal soap spray. Pay extra attention to the undersides of the leaves and where the leaves join the main stem. Repeat this treatment once every 7 days for at least three consecutive weeks to disrupt the insect breeding cycle.
8. Fungal, Bacterial, or Viral Diseases
Pathogens can easily infect a plant through open wounds, contaminated soil, or when water sits on foliage for too long.
The Problem
Microscopic fungal spores and bacterial colonies thrive in damp, stagnant environments. Once they gain a foothold inside the plant’s cellular wall, they consume the plant tissue, destroying chlorophyll cells and cutting off local nutrient transport lines.
How to Diagnose It
- Fungal/Bacterial Infections (Leaf Spot): The yellowing is rarely uniform. Instead, it appears as dark brown or black circular spots surrounded by a bright, distinct neon-yellow ring or halo.
- Viral Infections (Mosaic Virus): The leaf displays a mottled, patchy, or checkerboard pattern of alternating dark green and pale yellow. The foliage will often look puckered, wrinkled, or severely stunted.
The Solution
- Prune and Destroy Diseased Foliage: Carefully snip off any infected leaves showing spots or viral patterns. Clean and sanitize your pruning shears with rubbing alcohol between every single cut so you do not accidentally spread the disease to healthy parts of the plant. Do not compost these clippings—throw them directly into the trash.
- Apply a Copper Fungicide: Spray the remaining healthy foliage with an organic copper-based fungicide spray to create a protective barrier that halts fungal spore germination.
- Adjust Your Watering Technique: Stop watering your plants from above. Always apply water directly to the base of the soil, keeping the leaves completely dry. Increase room air circulation by using a small fan to ensure leaves dry out rapidly if they do get wet.
- Note on Viruses: There is no cure for plant viruses. If your plant is confirmed to have a mosaic virus, it must be discarded to save the rest of your garden.

9. Temperature Shock and Environmental Drafts
Many popular houseplants are tropical understory species that thrive in stable, warm, humid environments. Sudden environmental shifts stress their cellular structures.
The Problem
When a plant is exposed to a sudden, drastic drop or spike in temperature, its metabolic processes freeze up. Cold air breaks down chlorophyll molecules, while sudden dry heat speeds up evaporation beyond what the roots can supply. In response to this environmental shock, the plant drops foliage to protect its core structure.
How to Diagnose It
- Visual Clues: Multiple leaves across the entire plant will suddenly turn a pale, washed-out yellow almost overnight. This frequently happens right after moving a plant to a new room, bringing it home from a nursery, or during a seasonal weather shift.
- Location Check: The plant is sitting directly in front of an air conditioning unit, next to a heating vent, or touching a freezing window pane during winter months.
The Solution
- Create a Stable Microclimate: Move your plant to an area with a consistent room temperature between 18°C and 24°C.
- Avoid Major Drafts: Keep plants away from front doors that open frequently to the cold winter air, and pull them back so they do not make direct contact with cold window glass.
- Give It Time: If the plant recently transitioned to your home, do not fiddle with it, repot it, or fertilize it. Keep its watering consistent and let it naturally acclimate to the ambient humidity and light of its new space for a few weeks.
10. Natural Aging and Foliage Shedding
Not every single yellow leaf is a sign of an impending botanical disaster. Sometimes, it is just a natural part of the plant’s lifecycle.
The Problem
Leaves do not live forever. As a plant grows taller and produces brand-new leaves at its top canopy, the old leaves at the absolute bottom of the stem become shaded out and inefficient at producing energy. The plant makes a calculated decision to retire these obsolete leaves. It absorbs the remaining sugars and mobile nutrients out of the old leaf and allows it to fade away.
How to Diagnose It
- Visual Clues: The yellowing happens exclusively to one or two leaves at the very bottom of the plant’s main stem.
- Overall Health: The rest of the plant looks vibrant, healthy, and is actively pushing out fresh, flawless new green growth at the top or center.
- Frequency: This happens occasionally—perhaps one leaf every few weeks during the peak spring and summer growing seasons.
The Solution
- Do Nothing (Let Nature Work): You do not need to adjust your watering, change your lighting, or add chemicals to the soil.
- Clean Cleanly: Let the leaf turn completely yellow. Once the plant has finished reabsorbing its nutrients, the leaf stem will naturally dry up at the base. Give it a gentle tug; if it slips off easily into your hand without tearing the main stem, remove it and discard it. If it resists, leave it alone for a few more days until it is fully ready to drop.
Conclusion: How to Prevent Future Yellowing
To keep your garden and houseplant collection looking green and thriving, adopt these three simple habits:
- Always Check Before You Water: Never water on a strict calendar schedule. Invest in a simple moisture meter or stick your finger deep into the soil. If it feels damp, wait a few more days.
- Feed Wisely During the Growing Season: Provide a diluted, balanced organic liquid fertilizer once every two to three weeks from spring through early autumn to keep nutrient deficiencies at bay.
- Inspect Regularly: Spend a few minutes each week checking under the leaves for early signs of pests, spots, or dust buildup. Catching a problem early makes treatment significantly easier.

Leave A Comment