

31
Aug
- How to Save a Dying Plant Step by Step: Lumora Onlines Complete Houseplant Rescue Guide
- 1. Recognizing the Diagnostic Signs of a Dying Plant
- 2. Emergency Assessment: The Step-by-Step Rescue Plan
- 3. Treating the Root Problem: Healthy Roots vs. Root Rot
- 4. Problem vs. Solution Diagnostic Guide
- 5. Post-Rescue Care & Long-Term Maintenance
- The Ultimate Plant Rehabilitation Manual: Physiological Principles, Diagnostic Indicators, and Long-Term Care Strategies
- Rule 1: Never Fertilize Stressed Plants (Protecting Damaged Roots)
- Rule 2: Maintain Stable Temperatures (Mitigating Metabolic Stress)
- Rule 3: Practice Consistent, Dynamic Watering (Soil-Sensing Hydration)
- Complete 5-Step Plant Rehabilitation Protocol
- Recovery Protocol Summary
How to Save a Dying Plant Step by Step: Lumora Onlines Complete Houseplant Rescue Guide
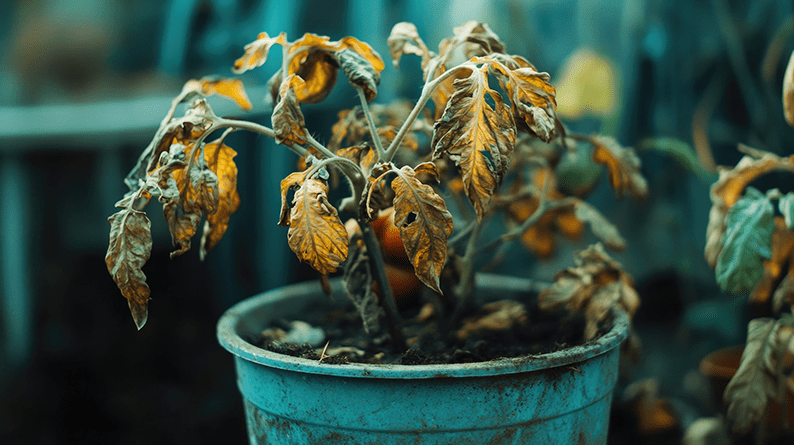
Learning how to save a dying plant step by step is a rite of passage for every plant owner. There is a distinct sinking feeling when you walk past a favorite Monstera, pothos, or fiddle-leaf fig and notice yellowing foliage, droopy stems, or crisp, brown leaves. Your immediate instinct might be to panic and flood the pot with water or blast it with heavy chemical fertilizer. However, reactive measures often cause more harm than good.
Reviving a struggling plant does not require a natural green thumb. It simply requires systematic observation, clear root diagnostics, and steady corrective action. At Lumora Online, we believe almost any houseplant can be brought back from the brink if you catch the warning signs early and fix the root causes.
In this comprehensive guide, we will break down the exact signs of plant distress, uncover why plants fail, and walk through the process of how to save a dying plant step by step so you can give your green companions a second life.
1. Recognizing the Diagnostic Signs of a Dying Plant
Before initiating an emergency plant rescue, you must identify what your plant is attempting to communicate. Plants express physiological distress through distinct visual signals.
Signs of Water Distress (Overwatering vs. Underwatering)
- Overwatering Symptoms: Soft, mushy, yellow leaves starting from the bottom of the plant; soil that smells sour or moldy; black stems near the soil line; leaves dropping while still wet and flexible.
- Underwatering Symptoms: Crisp, paper-dry leaf tips; curling leaves that fall off at the slightest touch; lightweight pot; soil pulling away from the inside edges of the container.
Signs of Light & Environmental Stress
- Too Little Light: Leggy growth (long, thin stems with wide spacing between leaves); loss of leaf variegation; zero new growth over several months; pale green or yellowing stems.
- Too Much Light / Sunburn: Bleached patches on leaves; brown, scorched spots facing window glass; dry, bleached foliage that crumbles when touched.
Signs of Pest Infestations & Nutrient Imbalances
- Pest Attack: Sticky residue (honeydew) on foliage, white cottony masses (mealybugs), fine webbing under leaves (spider mites), or tiny brown bumps on stems (scale).
- Nutrient Deficiency: Pale green foliage with dark green leaf veins (interveinal chlorosis), stunted leaf formation, or abnormal leaf cupping.
2. Emergency Assessment: The Step-by-Step Rescue Plan
Follow this sequential step-by-step procedure to diagnose and stabilize your plant.
1.Move to a Quarantine Zone:Prevents pest spread to nearby plants.
Isolate the sick plant immediately. If the issue is caused by spider mites, thrips, or fungus gnats, keeping it near healthy foliage allows pests to spread across your collection rapidly.
2.Inspect the Soil and Drainage Holes:Check moisture levels at the root zone.
Insert your finger 2 to 3 inches deep into the potting mix, or use a moisture meter. Inspect the bottom of the pot to ensure drainage holes are completely clear of debris or compacted roots.
3.Examine the Root System:Crucial step for severe leaf loss or wilting.
Gently slide the plant out of its container to inspect the root core. Healthy roots are firm, crisp, and white or light tan. Unhealthy, rotten roots look black, brown, slimy, and fall apart easily when touched.
4.Prune Away Dead Growth:Redirects energy toward living plant tissues.
Using disinfected pruning shears, snip off yellow, black, or dry brown leaves. Removing dead tissue stops rot from spreading and allows the plant to send nutrients exclusively to viable stems and roots.
5.Adjust Environmental Conditions:Stabilize light, humidity, and airflow.
Place the plant in bright, indirect sunlight away from active air vents, cold window drafts, or radiator heat sources. Avoid fertilizing a sick plant—fertilizer salts burn stressed roots.
3. Treating the Root Problem: Healthy Roots vs. Root Rot
Root rot is the single most common reason houseplants die. When soil remains saturated for extended periods, oxygen is driven out of the potting medium. Beneficial soil micro-organisms suffocate, allowing anaerobic fungi to attack and break down the root system.
Step-by-Step Root Rot Treatment Procedure
If your root inspection reveals brown, mushy, or foul-smelling roots, perform emergency root surgery:
- Unpot and Wash: Gently remove the plant from its container. Carefully rinse away all saturated, sour soil under lukewarm tap water so the bare root structure is completely visible.
- Prune Rot: Using sterilized shears (wiped down with 70% isopropyl alcohol), cut away every mushy, dark, or stringy root back to clean, firm, healthy tissue.
- Disinfect the Root Core: Spray the remaining healthy roots with a 3% hydrogen peroxide solution to kill remaining fungal spores, then allow them to air-dry for 20 minutes.
- Repot in Fresh Medium: Clean the original pot thoroughly with soap and warm water (or switch to a clean terracotta pot with clear drainage holes). Repot using a fresh, well-aerated potting mix containing perlite or orchid bark to ensure proper drainage.
- Hold Water Briefly: Wait 2 to 3 days before watering lightly. This allows fresh root cuts to callus over safely without re-infecting.
4. Problem vs. Solution Diagnostic Guide
Knowing how to save a dying plant step by step requires matching specific symptoms to their exact environmental remedies. Use this reference matrix to quickly troubleshoot plant issues:
| Problem / Symptom | Root Cause | Immediate Solution | Long-Term Prevention |
| Yellow, mushy leaves & wet soil | Severe Overwatering / Oxygen Suffocation | Stop watering immediately; check for root rot; repot in aerated soil. | Use containers with drainage holes; allow top 2 inches of soil to dry out between waterings. |
| Crisp, brown tips & soil pulling away from pot | Underwatering / Low Humidity | Perform a deep bottom-watering soak; mist surrounding air or use a humidifier. | Establish a regular soil moisture check schedule; group tropical plants together. |
| Peeled, scorched, or bleached spots | Direct Sunburn / Extreme Light | Move plant 3 to 5 feet back from South/West facing windows behind sheer curtains. | Research specific light needs (bright indirect vs. low light) before placement. |
| Pests (fine webbing, cotton spots, sticky leaves) | Insect Infestation (Mites, Mealybugs) | Wipe leaves with diluted neem oil or insecticidal soap; isolate plant. | Inspect underside of leaves weekly; dust leaves regularly to keep stomata clear. |
| Leggy growth & pale foliage | Insufficient Light | Gradually move plant closer to an unshaded window or install an LED grow light. | Rotate plant a quarter-turn weekly for balanced light distribution. |
5. Post-Rescue Care & Long-Term Maintenance
Once you have completed the initial diagnostic steps, your plant enters a delicate recovery period. Bringing a plant back to active growth takes time, and patience is essential.
┌─────────────────────────────────────────────────────────┐
│              RECOVERY TIMELINE EXPECTATIONS             │
├──────────────────────────┬──────────────────────────────┤
│ Phase                    │ What to Expect               │
├──────────────────────────┼──────────────────────────────┤
│ Days 1–7 (Stabilization) │ Leaf drop may continue slightly;│
│                          │ plant adapts to fresh soil.  │
├──────────────────────────┼──────────────────────────────┤
│ Weeks 2–4 (Root Healing) │ Below-ground root growth     │
│                          │ resumes; top growth pauses.  │
├──────────────────────────┼──────────────────────────────┤
│ Month 2+ (New Growth)    │ Fresh leaf buds appear;      │
│                          │ normal feeding can resume.   │
└──────────────────────────┴──────────────────────────────┘
The Ultimate Plant Rehabilitation Manual: Physiological Principles, Diagnostic Indicators, and Long-Term Care Strategies
Bringing a declining houseplant or outdoor nursery specimen back from the brink of collapse is one of the most gratifying skills a plant parent or horticulturist can master. Whether a plant is suffering from transplant shock, severe overwatering, root rot, extreme dehydration, or pest damage, its vascular and metabolic systems undergo severe stress. During this vulnerable recovery phase, a plant shuts down non-essential functions and enters a biological survival state.
The primary goal during plant rehabilitation is not to force rapid new growth, but to reduce environmental stress and preserve remaining healthy tissues. To successfully guide a struggling plant through recovery, you must adhere strictly to three golden rules: withholding fertilizer, maintaining thermal stability, and practicing dynamic, moisture-driven watering.
Rule 1: Never Fertilize Stressed Plants (Protecting Damaged Roots)
The instinct to feed a yellowing or drooping plant is a common trap. When foliage wilts or drops, well-meaning plant owners often assume the plant is starving and apply heavy doses of fertilizer. In plant physiology, fertilizing a stressed specimen is the equivalent of forcing a rich, heavy meal on a patient in intensive care—it overloads a compromised system and frequently proves fatal.
       [ High Salt / Fertilizer Load in Soil ]
                          │
                          ▼
       [ Reverse Osmosis (Water Drawn OUT) ]
                          │
                          ▼
   [ Plasmolysis (Root Cells Shrink & Burn) ]
                          │
                          ▼
[ Complete Transport Collapse & Systemic Failure ]
The Science of Osmotic Shock and Fertilizer Burn
Plant roots absorb water through a process known as osmosis—the passive movement of water across a semi-permeable cell membrane from an area of low solute concentration (the soil solution) to an area of high solute concentration (inside the root cells).
In a healthy plant, internal root cells maintain a higher concentration of natural sugars and minerals than the surrounding damp soil, allowing water to flow naturally into the root system and upward through the xylem.
When you add mineral or organic fertilizers (rich in nitrogen, phosphorus, potassium, and trace salts) to the soil of a stressed plant, the chemical dynamic changes drastically:
- Solute Imbalance: The concentration of mineral salts in the soil moisture spikes rapidly.
- Reverse Osmosis: If the salt concentration in the soil exceeds the solute concentration inside the root tissues, osmosis reverses direction. Water is actively pulled out of the root cells back into the soil to balance the gradient.
- Plasmolysis and Chemical Burns: As water drains from the root cells, internal fluid pressure (turgor) drops, causing the cell walls to collapse—a process called plasmolysis. Microscopic root hairs literally dry out, burn, and die off.
Micro-Wounds and Fungal Decay
A stressed plant almost always has a compromised root system. Whether damaged by anaerobic conditions from overwatering, physical breakage during repotting, or severe dry rot from prolonged neglect, the root system is covered in open micro-wounds.
Applying ionic mineral salts directly to torn or inflamed root tissue causes severe tissue necrosis. The damaged organic matter decays quickly in the pot, creating an immediate feeding ground for harmful soil pathogens like Pythium, Phytophthora, and Rhizoctonia, while destroying the plant’s remaining ability to take up water.
Safe Reintroduction of Nutrients
Patience is essential when reviving a declining plant. Hold off on all synthetic, organic, granular, and liquid fertilizers until the plant clearly shows that its root system has recovered.
| Recovery Phase | Visual Plant Indicator | Nutrient Action Plan |
| Initial Shock / Decline | Drooping, leaf drop, yellowing, soft stems | Zero Fertilizer. Clean, room-temp water only. |
| Stabilization | Leaf drop stops; remaining foliage regains firmness | Zero Fertilizer. Keep soil moisture balanced. |
| Early Regeneration | Emergence of bright, active new leaf growth | Apply liquid fertilizer diluted to 1/4 strength. |
| Full Recovery | Multiple fully expanded, mature leaves | Gradually resume standard feeding schedules. |
The appearance of fresh, healthy leaves indicates that the root network has regenerated functional root hairs that can safely absorb dissolved soil minerals.
Rule 2: Maintain Stable Temperatures (Mitigating Metabolic Stress)
Plants are poikilothermic organisms, meaning their internal temperature and metabolic activity are dictated by their surrounding environment. While healthy, mature plants can handle minor temperature shifts, a recovering plant lacks the metabolic reserves needed to adapt to climate instability.
Keeping a recovering plant in a stable temperature band between 65°F and 75°F (18°C to 24°C) establishes an ideal baseline for cell repair and root regeneration.
Cellular Metabolism and Temperature Extremes
All metabolic functions inside a plant—including respiration, root division, and hormone transport—rely on specific enzymes. These enzymes operate efficiently within a narrow temperature range:
[ Cold Temps (<65°F / 18°C) ]  ──> Stalls Cellular Enzymes ──> Root Rot Risk (Stagnant Water)
[ Hot Temps (>75°F / 24°C) ]   ──> Destabilizes Enzymes   ──> Excessive Transpiration & Death
- Cold Exposure (<65°F / 18°C): Low temperatures slow enzyme activity, putting photosynthesis and root development on hold. Cold air also drastically reduces soil evaporation. If a plant with damaged roots sits in cold, soggy soil, root rot speeds up while the plant remains dormant.
- Heat Stress (>75°F / 24°C): High temperatures accelerate respiration rates, forcing the plant to burn through stored carbohydrate reserves faster than it can produce them through photosynthesis.
Eliminating Drafts, Radiators, and HVAC Volatility
Beyond managing room temperature, it is vital to protect recovering plants from local micro-climatic volatility. Drafts and localized hotspots are major drivers of plant stress.
Air Conditioning Vents
Air coming directly from air conditioning units is cold and dry. Cold drafts striking leaf surfaces cause sudden localized cooling, causing stomata (leaf pores) to close unnaturally. Meanwhile, low humidity pulls moisture straight out of leaf margins, causing crispy leaf tips and edge scorching.
Heating Radiators and Vents
Placing a recovering plant near heat registers, radiators, or fireplaces subjects it to extreme heat paired with minimal humidity. High temperatures signal the plant’s stomata to open for cooling through transpiration. However, if the damaged root system cannot draw up water quickly enough to match this loss, the leaves dry out and wilt rapidly.
Creating an Ideal Recovery Micro-Environment
To maximize environmental stability during rehabilitation, set up your space using these practical guidelines:
- Window Clearance: Position recovering plants at least 2 to 3 feet away from window glass during winter cold snaps or summer heatwaves to block radiant heat and chill.
- Draft Neutral Zones: Keep plants away from entry doors, breezy hallways, and direct airflow from HVAC vents.
- Optimized Humidity: Keep ambient humidity between 50% and 65%. Adequate humidity lowers the vapor pressure deficit (VPD), reducing transpirational water loss from the canopy and easing demand on damaged roots.
Rule 3: Practice Consistent, Dynamic Watering (Soil-Sensing Hydration)
Flawless water management is the cornerstone of plant recovery. The core principle of plant rehabilitation is simple: Never water a recovering plant on a rigid calendar schedule.
  [ RIGID CALENDAR WATERING ]             [ DYNAMIC MOISTURE SENSING ]
 Water every Tuesday regardless           Check soil moisture visually & tactilely
              │                                        │
              ▼                                        ▼
    Overwatering / Rot Risk                 Delivers precise moisture on demand
A plant’s water needs change daily based on room humidity, light levels, seasonal temperatures, and available leaf surface area.
Adjusting for Reduced Water Demand
When a plant drops leaves due to stress, its total surface area decreases significantly. Because leaves act as the plant’s engine for transpiration (pulling water up from the roots and releasing it into the air), dropping leaves means the plant consumes dramatically less water than a healthy specimen.
If you continue to water a recovering plant on a set schedule (e.g., “every Monday”), the soil stays waterlogged for too long. Saturated soil fills the air pockets (macropores) between soil particles with standing water, shutting off oxygen access to the root zone. Plant roots require oxygen for cellular respiration; without it, root cells suffocate, decay, and die.
The Tactile Soil Inspection Method
Instead of relying on a calendar or an unreliable moisture meter, use this simple finger-test method before watering:
- Insert Finger: Push your index finger 2 to 3 inches deep into the soil mixture, placing it midway between the plant stem and the inner rim of the pot.
- Evaluate Moisture:
- Damp and Cool: If the soil feels cool, dark, and clings to your skin, do not water. Recheck the soil in 48 hours.
- Dry and Loose: If the top 2 to 3 inches feel dry, light, and crumbly, the plant is ready for water.
- Check Pot Weight: Lift the pot. Saturated soil feels heavy, whereas dry soil feels noticeably light. Over time, checking container weight becomes a fast, reliable way to judge moisture levels.
Proper Watering Technique
When the finger test confirms the soil is dry enough, apply water using proper techniques:
- Deep, Uniform Saturation: Pour room-temperature water evenly over the soil surface until it drains freely from the bottom drainage holes. This ensures the entire root ball receives moisture and helps flush out residual fertilizer salts.
- Drain Excess Standing Water: Never allow a recovering plant to sit in a saucer of drained water. Let the pot drain fully for 15 to 20 minutes after watering, then pour out any standing water from the saucer. Leaving standing water causes a wick effect that keeps the bottom soil layer permanently waterlogged, inviting anaerobic bacteria and root rot.
Complete 5-Step Plant Rehabilitation Protocol
Combine the three Golden Rules with this step-by-step diagnostic and care strategy to rescue declining plants.
[ Step 1: Diagnose Root System ] ──> Remove rotten roots & repot in fresh, airy medium
[ Step 2: Prune Dead Tissue ]   ──> Remove dead leaves; balance canopy with root capacity
[ Step 3: Optimize Light ]      ──> Place in bright, indirect light (NO harsh direct sun)
[ Step 4: Climate Control ]     ──> Keep at 65-75°F (18-24°C) with 50-65% humidity
[ Step 5: Dynamic Hydration ]   ──> Water ONLY when top 2-3 inches of soil test dry
Step 1: Inspect and Sanitize the Root Mass
If overwatering, unpleasant soil odors, or root rot are suspected:
- Gently slide the plant out of its container to inspect the root network.
- Identify Root Health: Healthy roots feel firm and appear white, tan, or yellow. Rotten roots look black or dark brown, feel soft or stringy, and often emit a sour smell.
- Prune Rot: Using sharp scissors or shears sterilized with 70% isopropyl alcohol, trim away all mushy, damaged roots back to healthy tissue.
- Repot: Rehouse the plant in a clean pot with functional drainage holes using a fresh, loose soil mix (amended with 30% perlite, pumice, or orchid bark to ensure root aeration).
Step 2: Prune Damaged and Dead Foliage
A damaged root system cannot support a full leaf canopy. Trim away completely yellowed, brown, or crispy leaves. Pruning dead foliage reduces overall transpirational water loss, allowing the plant to direct its limited energy reserves toward root repair rather than maintaining dying leaf tissue. Keep any leaves that are still mostly green, as they continue to perform photosynthesis and supply necessary energy.
Step 3: Optimize Indirect Lighting
Light drives photosynthesis, providing the glucose needed for cellular repair. However, recovering plants cannot handle intense direct sunlight.
- Avoid Direct Sunlight: Harsh, unshaded sunlight overheats damaged leaves, accelerates transpirational water loss, and can easily scorch fragile foliage.
- Provide Bright, Indirect Light: Place the plant in a spot with strong, filtered ambient light (such as a few feet back from an east- or south-facing window, or behind a sheer curtain). Bright indirect light supplies maximum energy for growth without causing heat stress.
Step 4: Maintain Micro-Climate Control
Keep room temperatures steadily between 65°F and 75°F (18°C to 24°C). Shield the plant from air conditioning blasts, heating vents, and drafty doorways. Maintain relative humidity between 50% and 65% to support leaf tissue hydration.
Step 5: Follow Dynamic Moisture Management
Hold off on rigid watering schedules. Test the top 2 to 3 inches of soil manually every few days, watering thoroughly only when the soil feels dry to the touch. Ensure all excess drainage water is emptied from the tray immediately.
Recovery Protocol Summary
- Withhold Fertilizer: Keep all fertilizers away from recovering plants. Reintroduce liquid nutrients diluted to 1/4 strength only after active new leaves appear.
- Maintain Climate Control: Keep ambient temperatures steady between 65°F and 75°F (18°C to 24°C). Keep plants away from cold drafts, heat vents, and AC units.
- Water Dynamically: Avoid calendar-based watering schedules. Use the finger test to check the top 2 to 3 inches of soil, watering thoroughly only when dry, and always dump out standing saucer water.
- Provide Indirect Light: Place plants in bright, indirect light to fuel cell repair while protecting leaves from harsh, direct sun.
By prioritizing soil oxygenation, maintaining stable ambient conditions, and respecting the natural timeline of plant cell repair, you give your recovering plant the ideal environment to rebuild its root system and return to vigorous growth.

Leave A Comment